Editing Support in Text Editor
Syntax Highlighting in Text Editor
The Text Editor, while in Flora mode, uses different colors for different elements of the Flora-2 language. These color options are user-configurable under Preferences > Sunflower Preferences > Flora Editor Preferences. Some of the default color settings are as follow:
Blue: individuals, classesBlack: properties, predicates
Salmon: numbers and other data types
Teal: comments
Gray: variables
Purple: parentheses, commas, keywords
Below, Fig. 118 and Fig. 119 show the highlighting of family.flr when the file is loaded in the Text Editor:
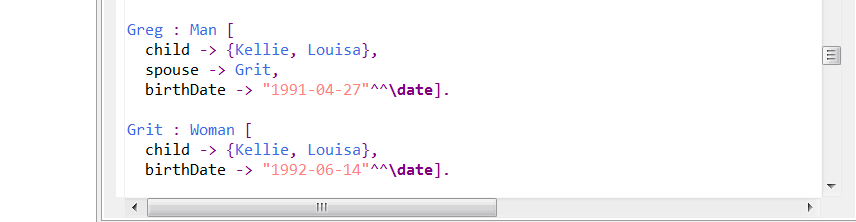
Fig. 118 Blue for individual and Salmon for birthDate
Fig. 119 Gray for variable and Teal for comment
Other conventions used by the Text Editor include upper-casing first letter for individuals and classes, and lower-casing first letter for properties. The Text Editor displays identifiers with upper-case first letter in Blue, otherwise in Black.
Double-clicking to Highlight a Variable in a Rule
Double-clicking a variable in a rule will highlight all the occurrences of that variable in the rule, as shown in Fig. 120. This feature helps to make sure that there are no typos in variable names.
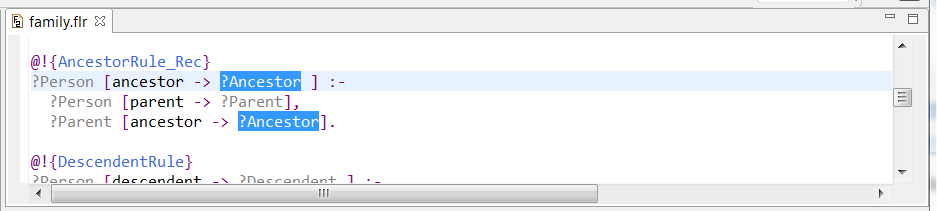
Fig. 120 Variable highlighting
Double-clicking to Highlight an Identifier in a File
Similarly, all occurrences of the same predicate, class, or individual in the file currently loaded can be highlighted by double-clicking the identifier. This is particularly helpful when trying to see where a given identifer is used, as shown in Fig. 121.
Fig. 121 Identifier highlighting
Auto-completion and smart indentation help
Brackets are used to group similar elements together when creating classes and instances in a Flora ontology file. The Text Editor helps line up elements which belong at the same level or to the same set of brackets with automatic bracket completions and line indentations. The following example shows the types of automatic completion and indentation available in the Text Editor.
In the Text Editor, enter the following:
Tina : Woman [
Upon entering [, ] is automatically inserted to help close out the open square bracket, as shown in Fig. 122.
![**]** is automatically inserted after **[**](../../_images/auto-completion-indentation-help.png)
Fig. 122 ] is automatically inserted after [
Hit return, and type:
hobby -> {
The line hobby is automatically indented to a level below Tina, indicating that it is an attribute of Tina. After { is typed, } is automatically inserted to close out the open curly bracket. The ] inserted from before is now placed on a separate line indented at the same level as Tina. All these can be seen in Fig. 123.
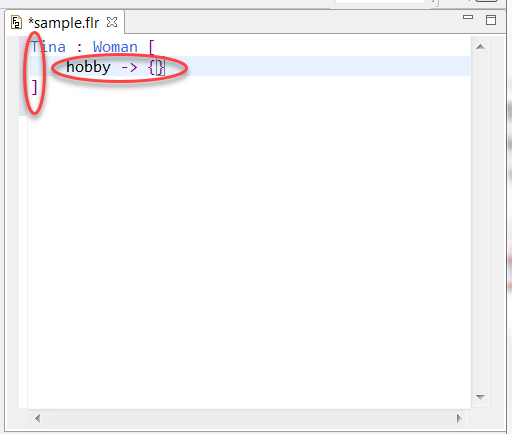
Fig. 123 hobby is indented and } is automatically inserted after {
Hit return. The next line automatically starts out with a second level indentation. It is expected to be part of hobby which in turn is part of Tina. The } inserted earlier is now on a separate line indented at the same level as hobby.
Type “swimming,” and then return. The next line is also automatically indented to the same level as swimming, in anticipation that more terms similar to swimming are to follow. Type “reading” as in Fig. 124.
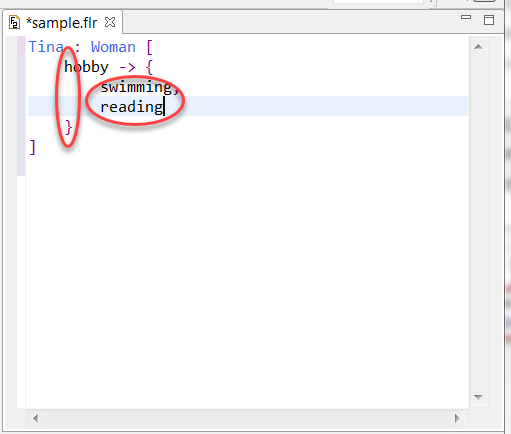
Fig. 124 swimming and reading are automatically indented at the same level
Place the cursor at the position immediately after }. Type comma or , and hit return to start a new line. Notice that this new line starts out indented at the same level as hobby, as seen in Fig. 125. The Text Editor is expecting other attributes similar to hobby to be entered. We will add a second and final attribute called height.
Type the following to finish the attribute list for Tina. Then type a period or . at the end, following ].
height -> quantity(1.6,eng_val#meter)
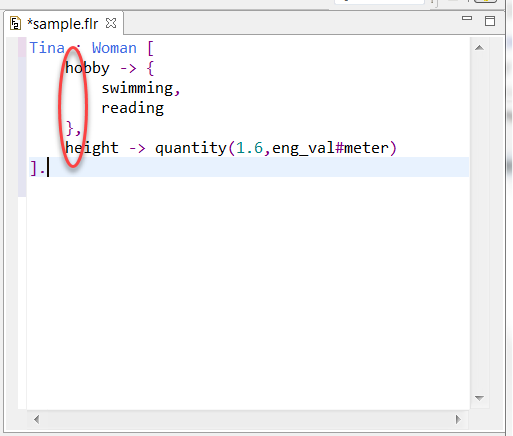
Fig. 125 The line height is automatically indented to the same level as hobby
Smart indentation is also available during rule or query editing in the Text Editor for well-known keywords. We will create an ageGroup rule as an example to illustrate this.
Enter the following rule head and hit return.
ageGroup(?X,?AgeGroup) :-
The next line starts out in an indented position. It is expected to be part of the rule body. Enter the first line of the rule body and hit return.
?X [ age->?Age ],
The second line is again automatically indented to the same level as the first, as shown in Fig. 126.
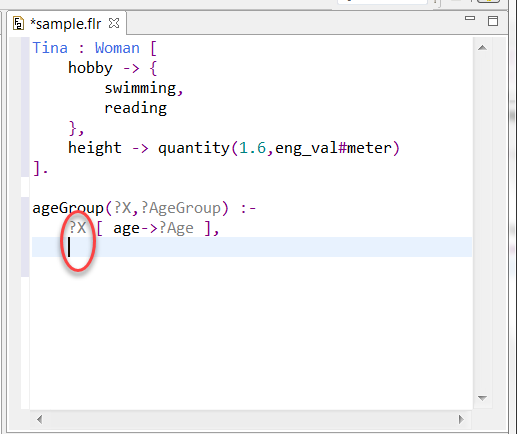
Fig. 126 2nd line of rule body is indented at the same level as 1st line
The second line of our rule body is an if-then-else statement. The Text Editor recognizes well-known Flora keywords such as If, then and else. When we enter the if part of the second statement and hit return, the next line is automatically indented deeper because it is expected to be part of the if-then-else body, as seen in Fig. 127.
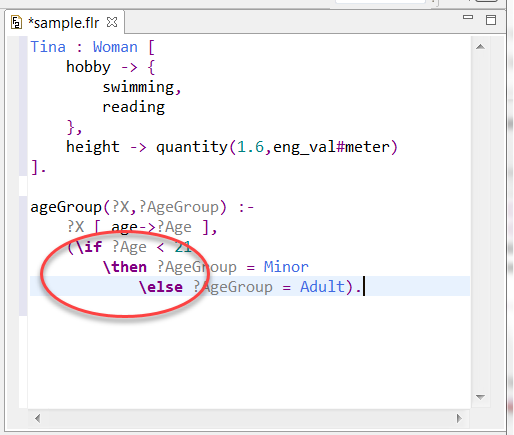
Fig. 127 Automatic line indentations for if-then-else statement